DECOLAV 9296-CP Przewodnik Instalacji
Przeglądaj online lub pobierz Przewodnik Instalacji dla Nie DECOLAV 9296-CP. DECOLAV 9296-CP Installation Guide Instrukcja obsługi
- Strona / 3
- Spis treści
- BOOKMARKI
- 9296 SerieS 1
- Serie 9296 2
- Série 9296 3
Podsumowanie treści
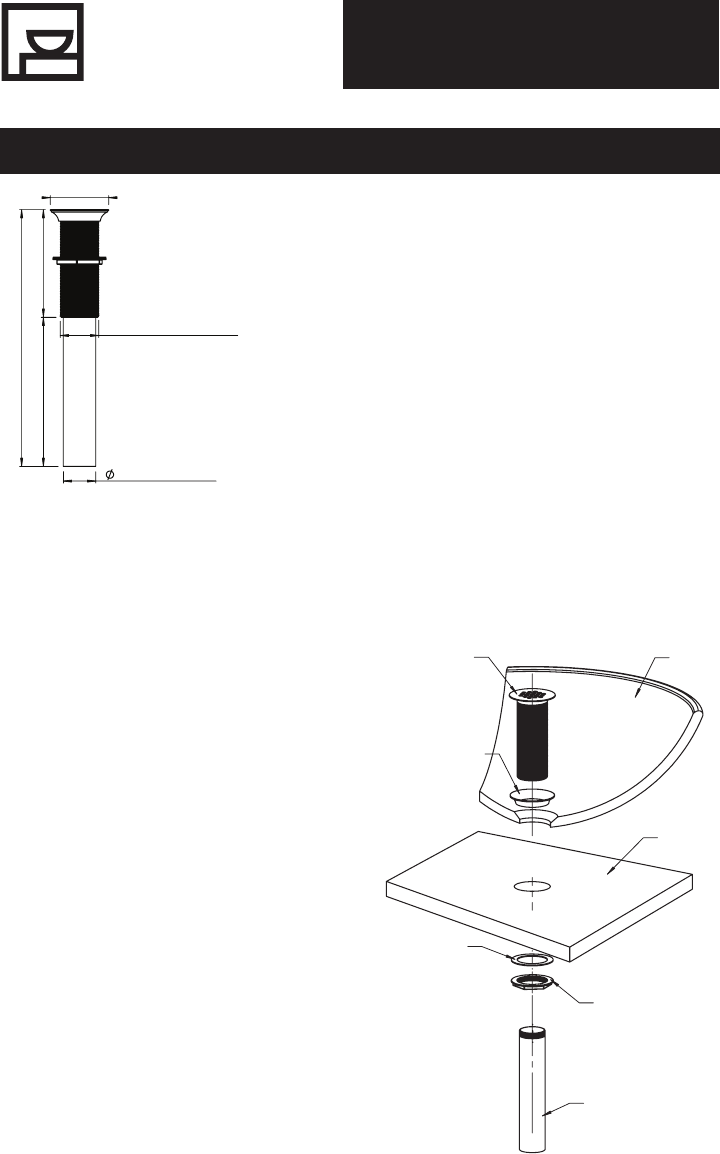
• Install Lavatory according to manufacturer’s provided installation instructions.• Remove Drain Nut and Hard Washer from Drain.• Insert Black Washer
• Instale el lavamanos según las instrucciones de instalación del fabricante.• Extraiga la tuerca del desagüe y la arandela rígida del desagüe.• Inser
• Installez le lavabo selon les directives d’installation du fabricant.• Retirez l’écrou de vidange et la rondelle dure du drain.• Insérez la rondelle
Powiązane produkty i podręczniki dla Nie DECOLAV 9296-CP


 (3 strony)
(4 strony)
(4 strony)
(4 strony)
(4 strony)
(6 strony)
(10 strony)
(5 strony)
(5 strony)
(10 strony)
(3 strony)
(4 strony)
(4 strony)
(4 strony)
(4 strony)
(6 strony)
(10 strony)
(5 strony)
(5 strony)
(10 strony)
 (6 strony)
(7 strony)
(18 strony)
(11 strony)
(6 strony)
(15 strony)
(5 strony)
(11 strony)
(5 strony)
(5 strony)
(6 strony)
(7 strony)
(18 strony)
(11 strony)
(6 strony)
(15 strony)
(5 strony)
(11 strony)
(5 strony)
(5 strony)
© 2020, manymanuals.pl. Wszelkie prawa zastrzeżone. | 0.134 s |
 Manymanuals.com
 Manymanuals.de
 Manymanuals.fr
 Manymanuals.it
 Manymanuals.pl
 Manymanuals.cz
 Manymanuals.es
 Manymanuals-pt.com
Komentarze do niniejszej Instrukcji